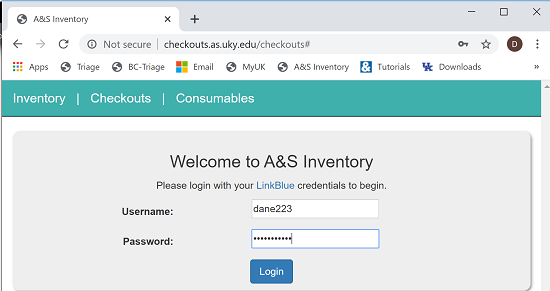
Go to https://checkouts.as.uky.edu/checkouts and login with your linkblue credentials.
Understanding the different parts on the checkouts page.
1. Allows you to search all checkout equipment for a specific window of availability.
2. If you press the ‘Overdue Items’ button it will show you all items that are overdue. Note: Once the end date is reached, the system will send an automated message everyday reminding the person the item is overdue.
3. Here you can sign out of checkouts and manage preferences.
4. You can see all items we have in checkouts and you have to use the arrows to see twenty items at a time. The items are organized by their asset name by default.
5. The view reservations button allows you to see all reservations made by other Arts and Sciences users. We can approve or deny reservations. When a reservation is approved or denied the requestor receives an email. If someone has the additional permissions to the checkouts website and they make a reservation it is automatically approved. No email is sent to the requestor.
6. When you create a reservation you need to know the start date (can only be the current or future day), the end date, and linkblue of the user (the system will check to make sure that is an active linkblue).
7. There are four statuses
- Available – meaning someone can check out that item at any time.
- Reserved – meaning someone has had their reservation reserved and has not
actually checked the item out.
- Checked out – meaning the reserved item has been picked by the client.
- Overdue – meaning the client is past their predetermined return date.
8. Shows you the linkblue of the user and a picture if they have a picture on their A&S website profile.
9. Shows you the model of the device.
10. Is the non-technical description of the device. Can include anything that helps identify the item as well. For example, The Bio-informatics laptops are only supposed to be used by the Biology students taking that class.

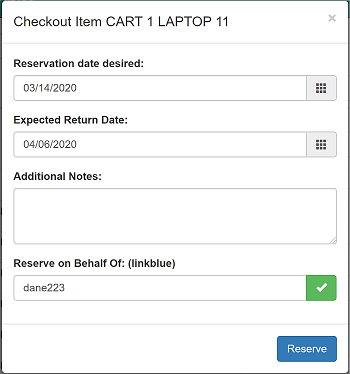
To create a reservation go to the 'Create Reservation' button.
You will need the Reservation date desired, Expected Return Date, and linkblue of the client. When finished press the 'Reserve' button.
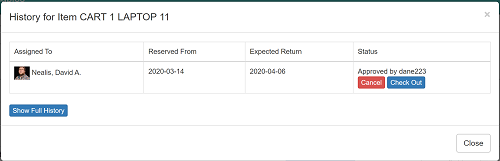
When someone is ready to pickup thier reserved equipment go to the 'View Reservations' button.
If a reservation has not been approved you will have to approve the reservation under the 'View Reservations' button.

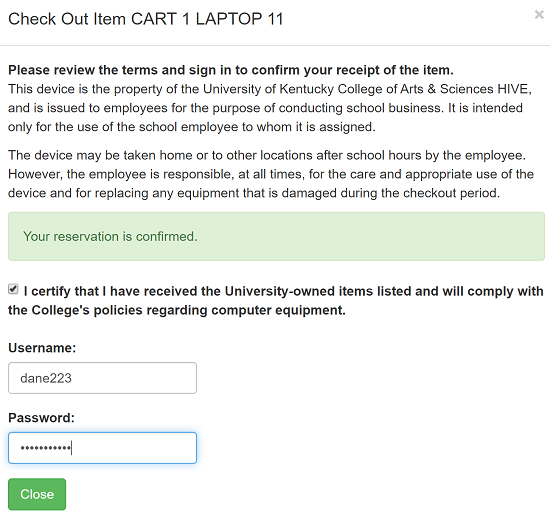
Press the 'checkout' button.
The user needs to click the check box and sign in with their linkblue credentials.
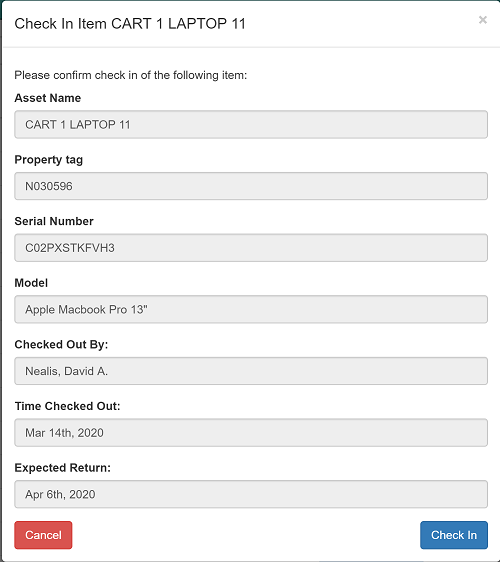
When checking in an item make sure everything that was checked out has come back.
For instance, if someone checked out a laptop and charger do not check the laptop in without the charger.